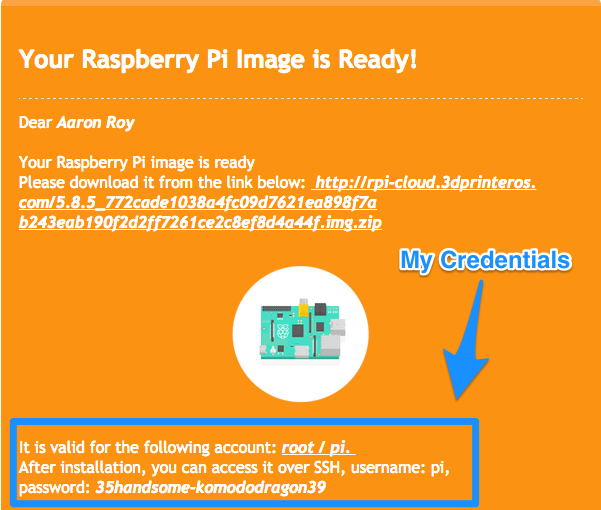
These instructions are for setting up your Raspberry Pi and Wifi to work with your 3D printer in 3DPrinterOS. Prior to following these steps, you should have already requested a Pi image, downloaded and flashed the Pi image to Pi and have everything plugged in and turned on.
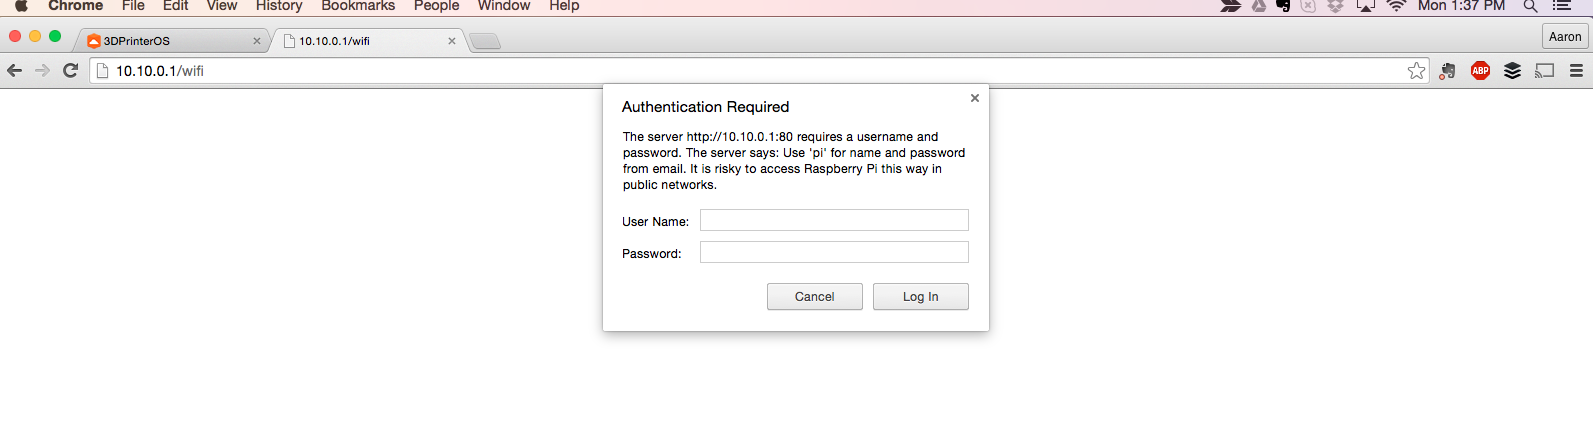
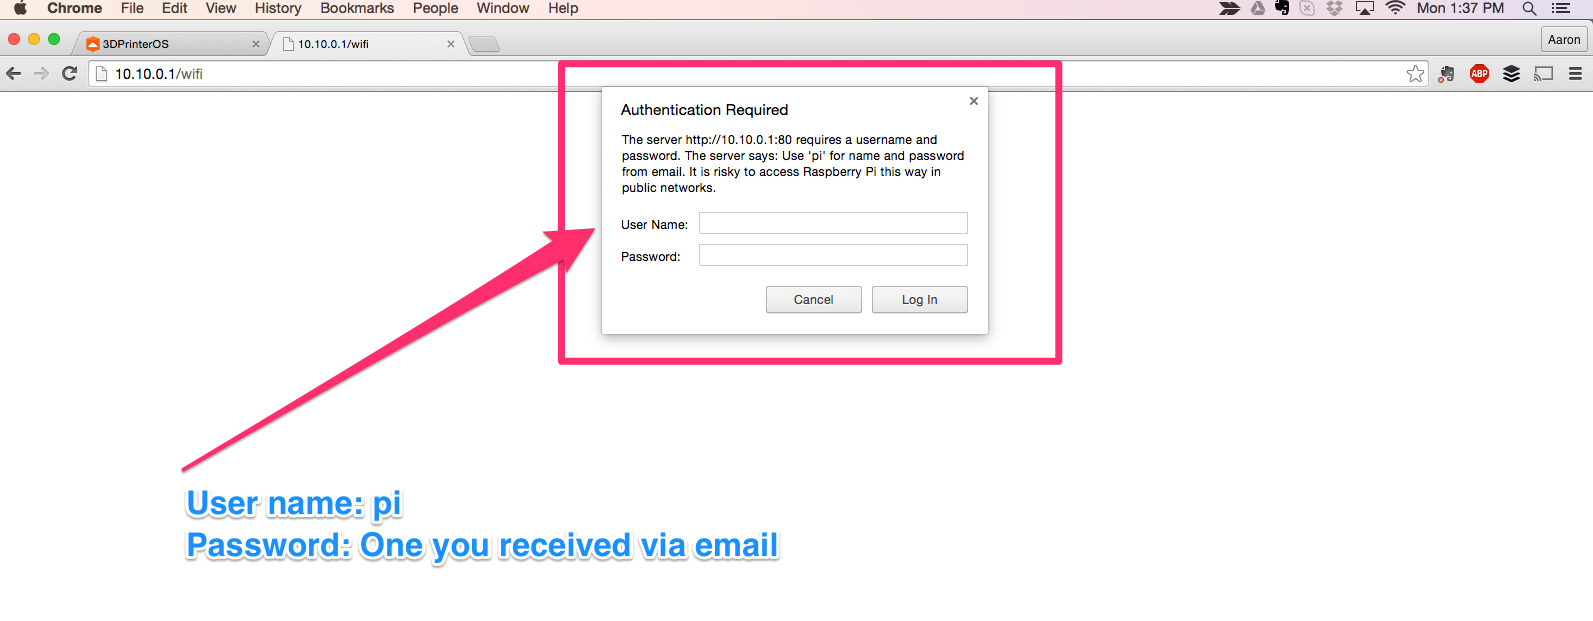
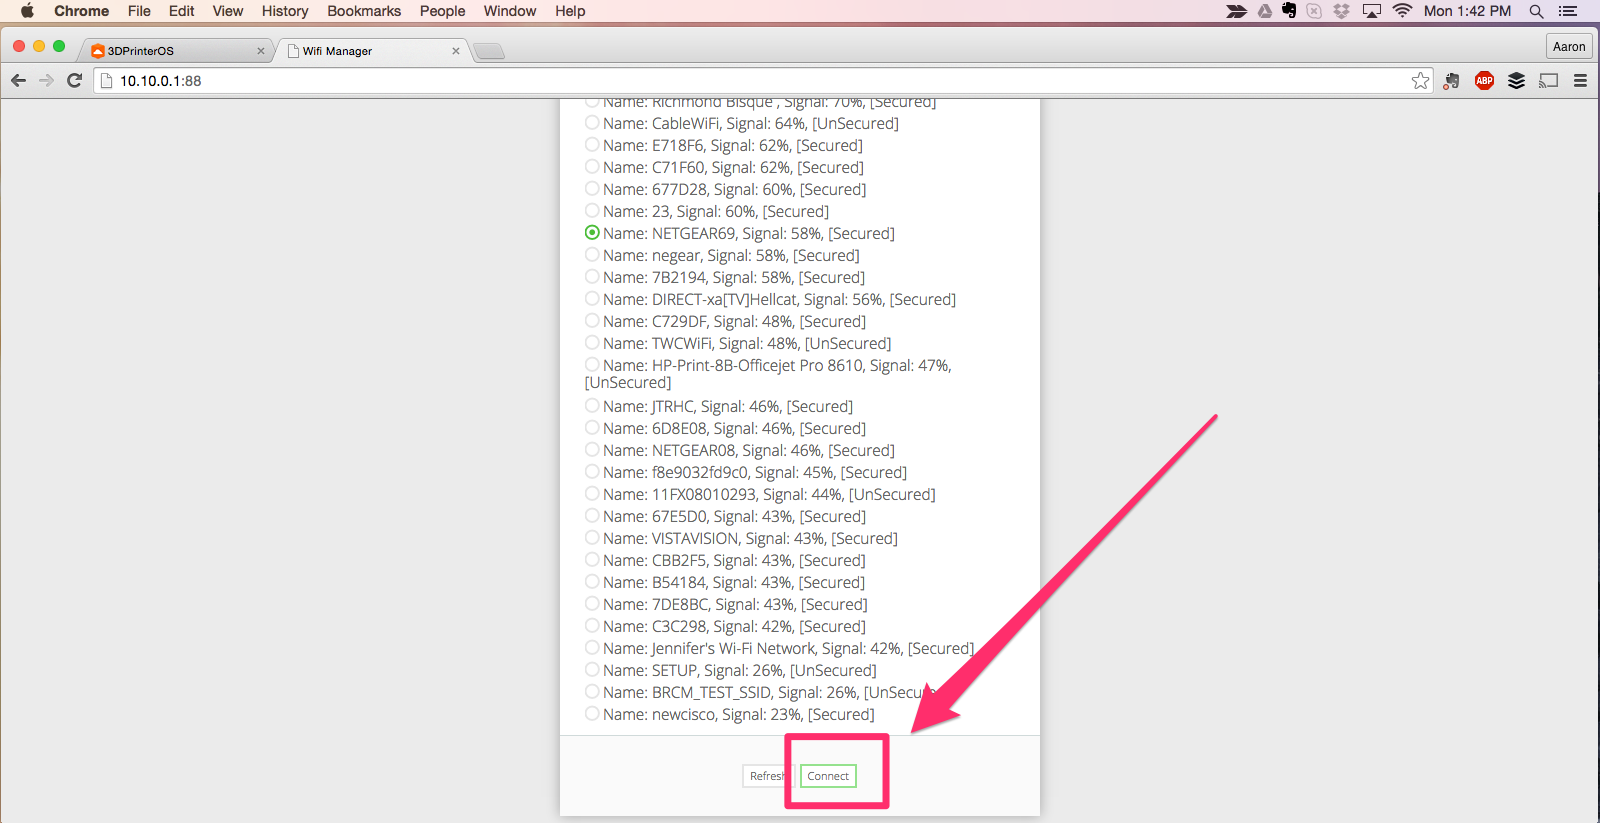
Step 1. Connect to the 3DPrinterOS Hotspot (from any web-capable device)
great directions, I have the Pi up and running. The Pi can ping the internet, it can even resolve 3dprinteros.com, so I know it’s getting DNS too. but it’s not showing up on my printer screen.
Are there ports that need to be unblocked on my schools firewall?
ALSO
can I manually assign an IP to the Pi, or do I have to configure my own DHCP to always hand out the same IP?
I can connect to 3DPrinterOS Hotspot (Win8.1 tells me that connection is limited which makes sense, and also that it is insecure, just FYI)
But then http://10.10.0.1/wifi ends up nowhere. Pinging is not successful either. Checked all scenarios in Infographics but none of them helps me solve my problem
Is there a way I can setup wifi via ssh / modifying a config file?
This is disappointing, it requires that I connect the Pi to a keyboard and monitor which I don’t always have available. Having a method that allows me to configure the connection headlessly and no ethernet was very helpful.
While SSH eliminates the need for the keyboard, you still need the monitor in order to get the ipaddress of the device. What would truely be incredible, it gathering the WiFi information (SSID, auth) when requesting the image and having that put into the image automatically.
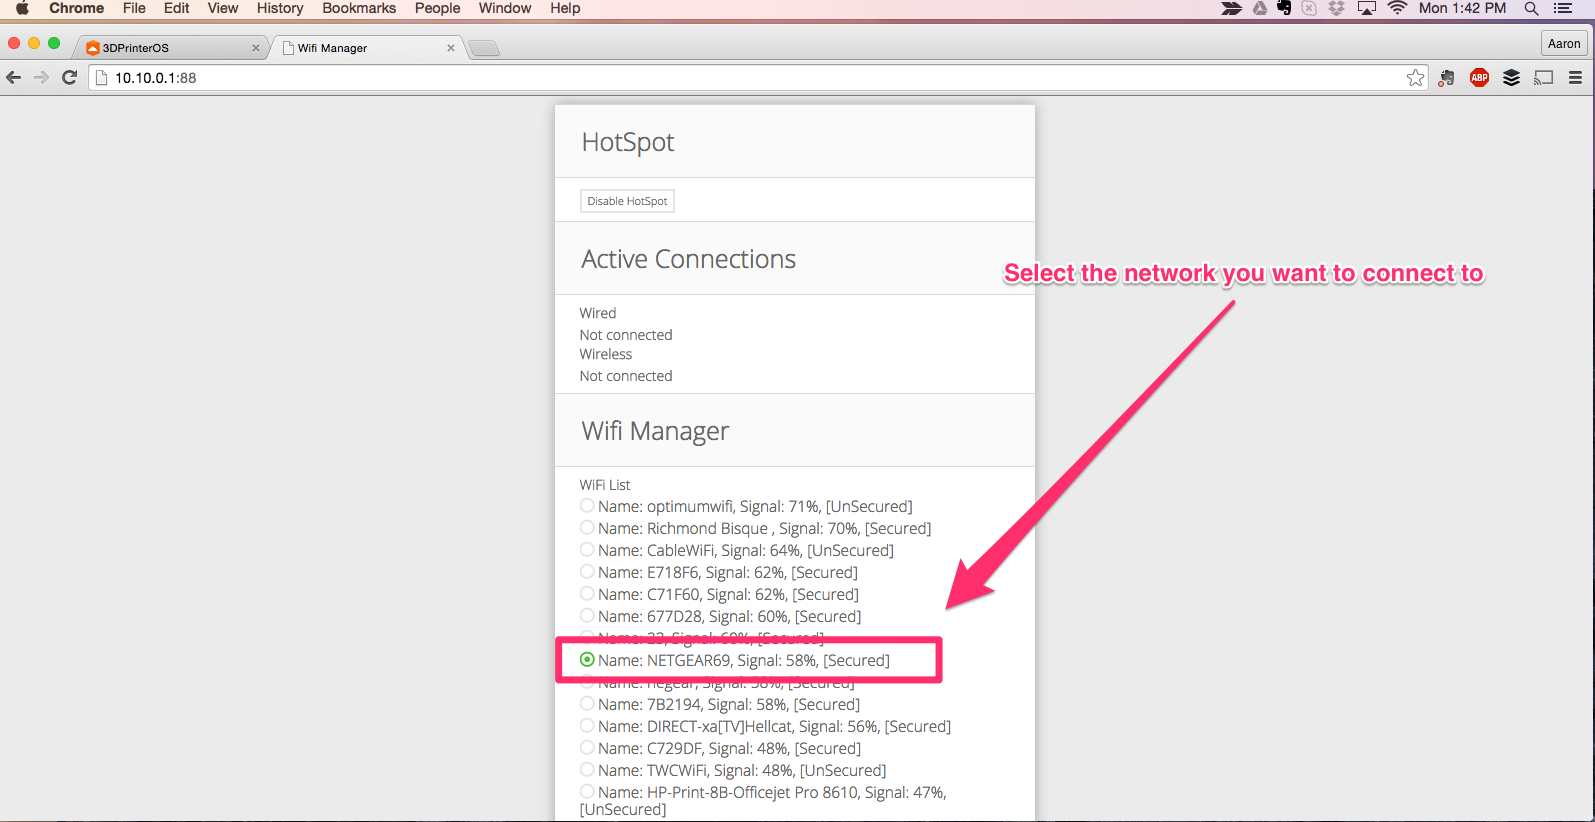
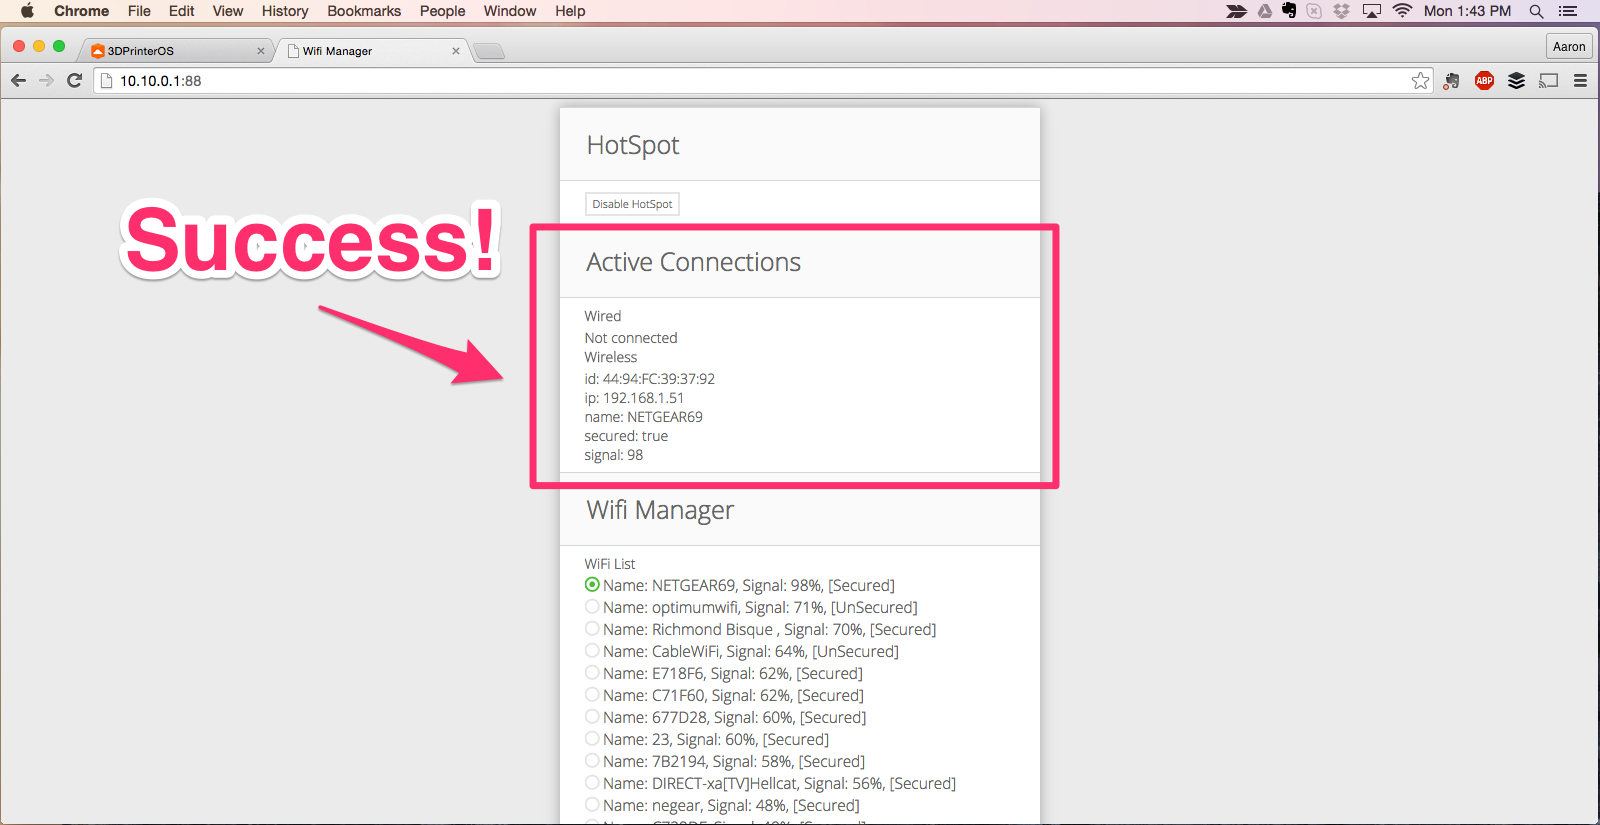
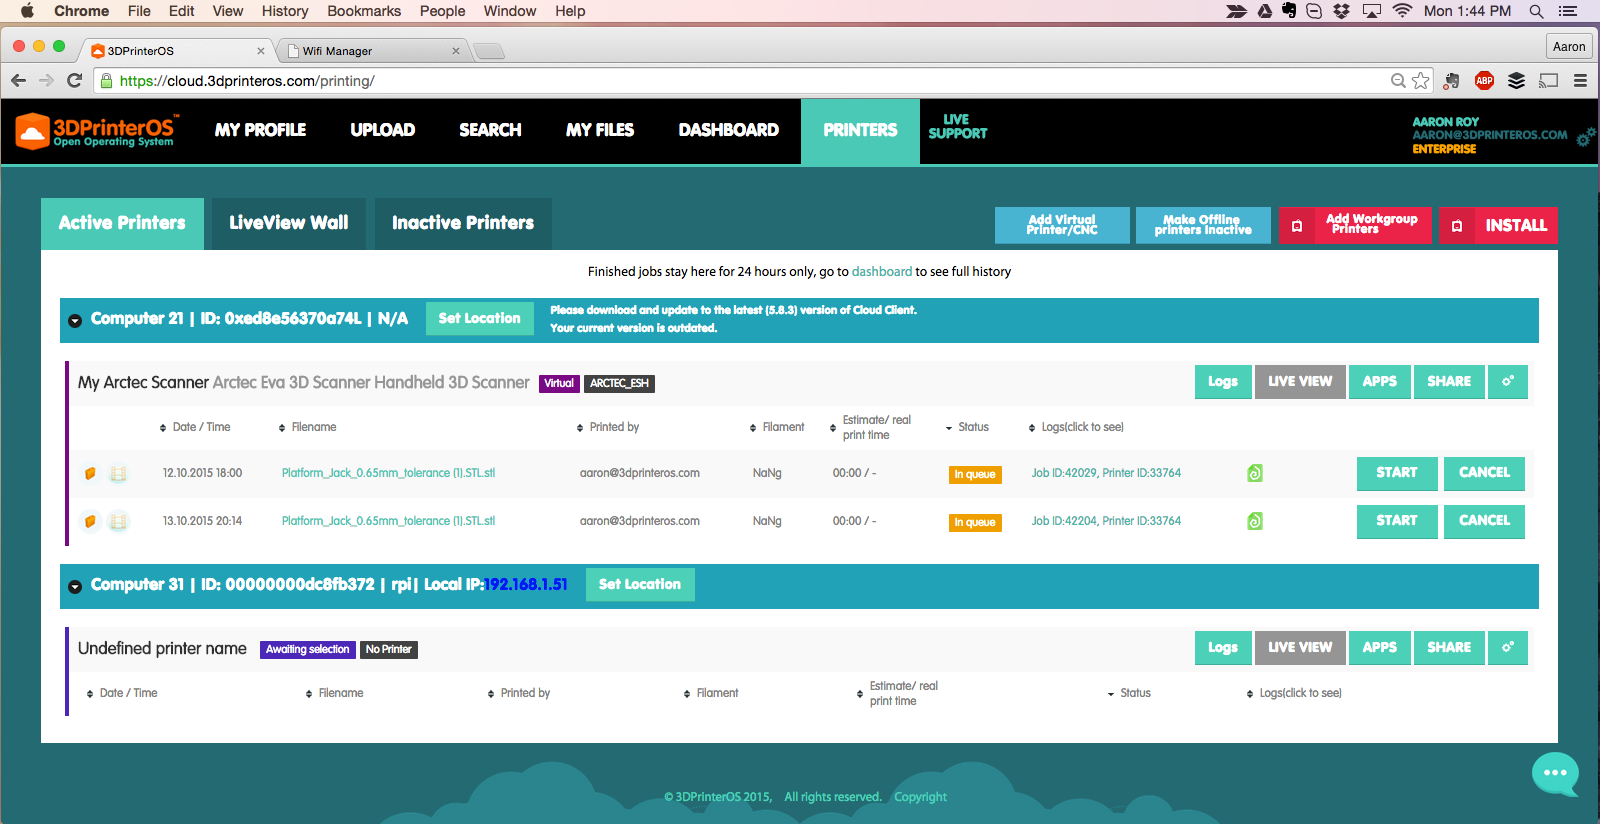
Michael…the instructions listed above use a remote computer (say a desktop or laptop) to first connect to the raspberry pi using a normal web browser on said computer, then connect the raspberry pi to your home wireless. It then gives you the raspberry pi’s new IP address right in the browser. No need to hook anything external up to the raspberry pi itself other than a wi-fi dongle if it’s a Pi 1 or 2. And SSH requires no monitor.
So, I guess I’m missing something when you say you still need a monitor. You shouldn’t need a separate monitor for the pi at all with these instructions.
My bad I didn’t see the update. I always just used the ethernet and checked the DHCP client list in my router. That got me into SSH.
I thought you could use a wpa_supplicant.conf file in the boot partition of the SDCard to setup an auto connect to the wireless like you can with the raspbian OS. But I just tried it and I guess not. And that link is no help as it mentions using a console cable.
So, yeah. Not good. I wouldn’t want to send my SSID and password to a webapp and get a custom image. But the image should auto move a wpa_supplicant.conf file from boot into the appropriate location on boot like it does on Raspbian.