These instructions are for setting up your Raspberry Pi and Ethernet to work with your 3D printer in 3DPrinterOS. Prior to following these steps, you should have already requested a Pi image, downloaded and flashed the Pi image to Pi and have everything plugged in and turned on.
Step 1: Make sure your Raspberry Pi and 3D printer are turned on
Step 2: Go to your account’s “Printers” tab. Found at http://cloud.3dprinteros.com/printing
Step 3: You should see a new printer “Awaiting Selection”

Step 4: Choose what printer type you have and click save
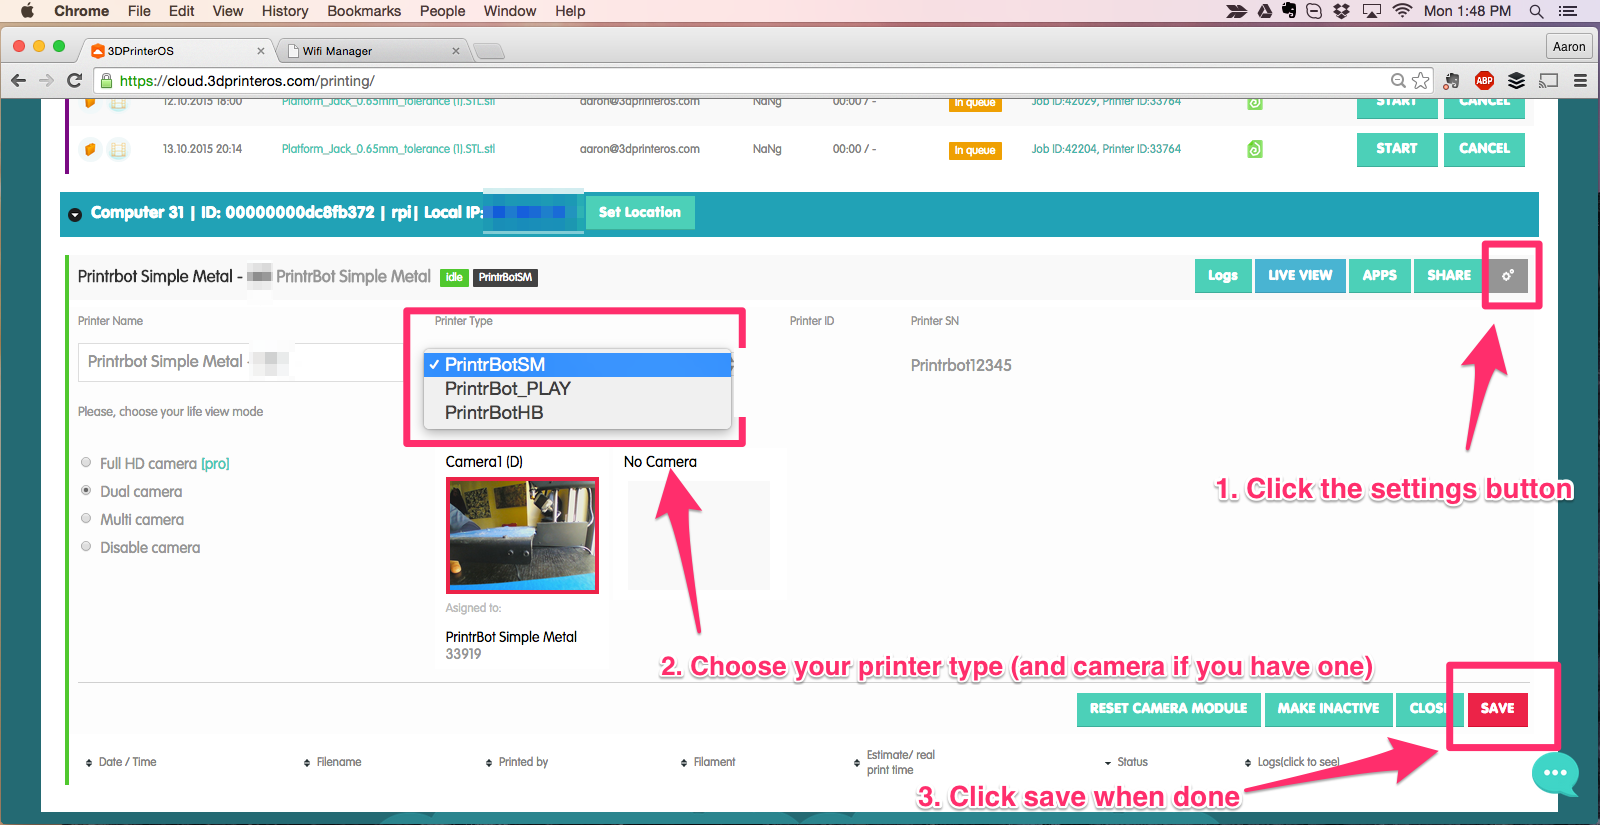
Step 5: Your printer’s status should switch from “Awaiting Selection” to Idle and be ready for printing!
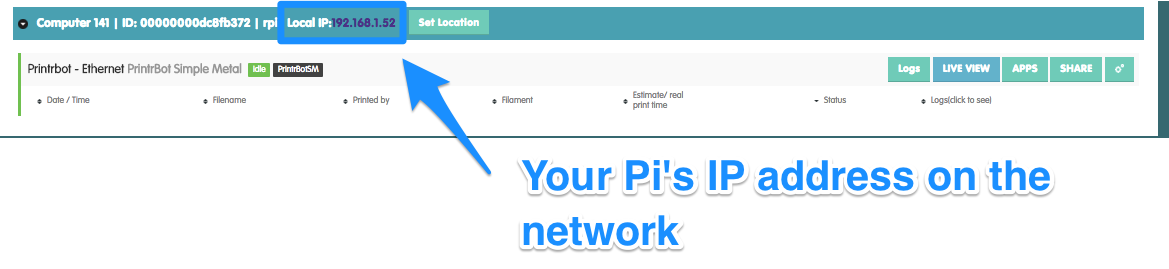
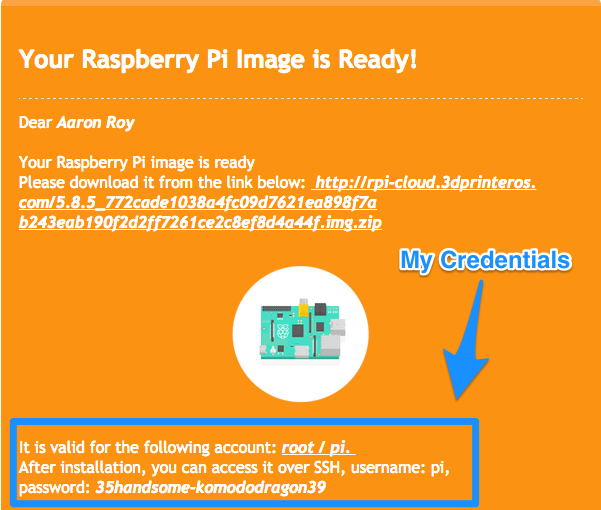
If you need to SSH into your Pi simply click or copy and paste the local IP into a new browser tab. Your SSH credentials will have been in the email that you received which had the Raspberry Pi image (see example below):